Initial Device Setup
2.1 Power On and Preparation
Step 1: Insert Authorization Card and SIM card
- Open the battery back cover.
- Insert the Authorization Card (PSAM/SIM-1 slot).
- Insert the SIM Card (Nano SIM slot); skip this step if using WiFi.
Close the battery back cover.
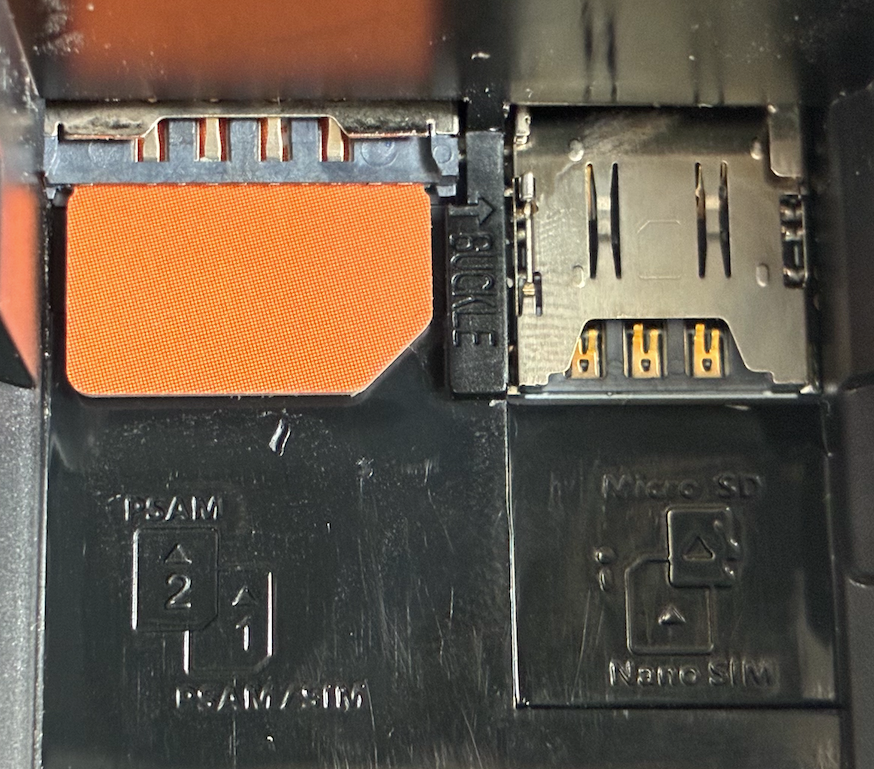
*The POS Terminal has a total of 4 slots. The Authorization Card should be inserted into slot 1. Please note that slots 1 and 2 are dual-layered, one above the other, with slot 1 on the lower layer.
Step 2: Power On and Network Connection
- Press and hold the power button for 3 seconds.
- Wait for the system to start (approximately 30 seconds).
- Enter the device activation interface, where New Card Detected will be displayed.
- Navigate to the 「Settings」 interface.
- Select 「Network & internet」.
- Select WiFi and enter the password (if using WiFi).
- Wait for the connection to be established successfully.
2.2 Activation and Configuration
- Click the Home icon at the bottom of the screen to return to the device activation interface.
- Click Continue to enter the address setting interface.
- Scan the code or enter the Merchant Withdrawal Address and Installer Reward Address.
Click Confirm to complete the setup and enter the PAYDAO application interface.
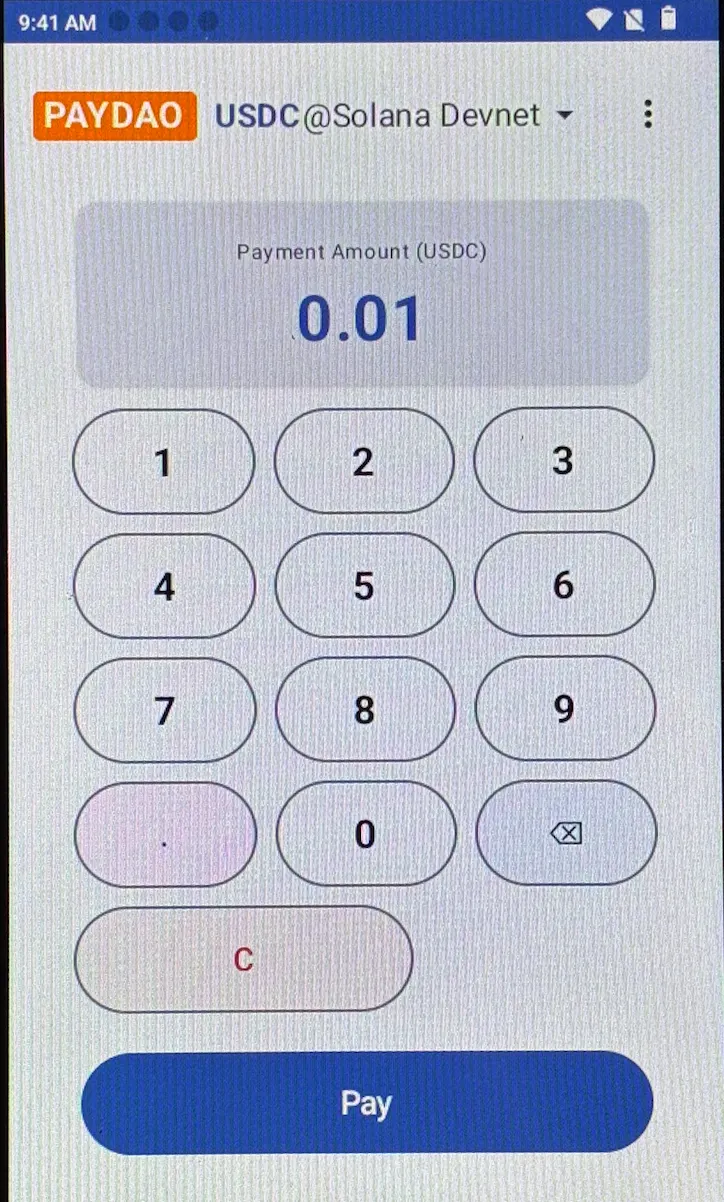
Important Note:
*The above addresses must be accurate; once set, they cannot be changed.